Async JavaScript and the Fetch API
Learning Outcome Guide
Section titled “Learning Outcome Guide”At the end of this class, you should be able to…
- Explain the concept of asynchronous programming and the event loop in JavaScript.
- Utilize promises and async/await syntax to handle asynchronous operations.
- Implement the fetch API to make HTTP requests to server-side endpoints.
- Render and update UI using JSON API data and basic error handling.
Additional Notes: Have students read chapter 13 from JavaScript from Beginner to Professional
Coding Demo
Section titled “Coding Demo”In-Class Demo Jan 2026 term
To run the coding demo, you need to have your Student Workbook open in Visual Studio Code.
-
Open the terminal window and paste in the following.
Run from the root of your repository pnpm dlx tiged --disable-cache --force DG-InClass/SDEV-1150-A04-Jan-2026/sk/lesson-16 ./src/lesson-16 -
Walk through the steps in the
ReadMe.mdof the new lesson.
Install dependencies and run the dev server
Section titled “Install dependencies and run the dev server”- Extract the starter zip and rename the folder to
lesson-16 - Move into the lesson-16/ directory:
cd lesson-16- Install the necessary dependencies:
npm installor
npm i- Run the dev server with the
devscript:
npm run dev- Open the provided development server URL in your browser
- You should see the default render for the vite project.
- Use this as the base for today’s examples.
2. Inspect the Database File
Section titled “2. Inspect the Database File”A database file named db.json has been provided for you:
{ "books": [ { "id": "1", "title": "The Legend of Hyrule", "author": "Zelda", "year": 2020, "genre": "Fantasy" }, { "id": "2", "title": "The Hero’s Journey", "author": "Link", "year": 2022, "genre": "Adventure" }, { "id": "3", "title": "Chronicles of Ganon", "author": "Ganondorf", "year": 2021, "genre": "Epic" } ]}3. Start the API Server
Section titled “3. Start the API Server”Run the dev server with the api-server script:
npm run api-serverYou should see routes listed like:
Keep this running while working in your project.
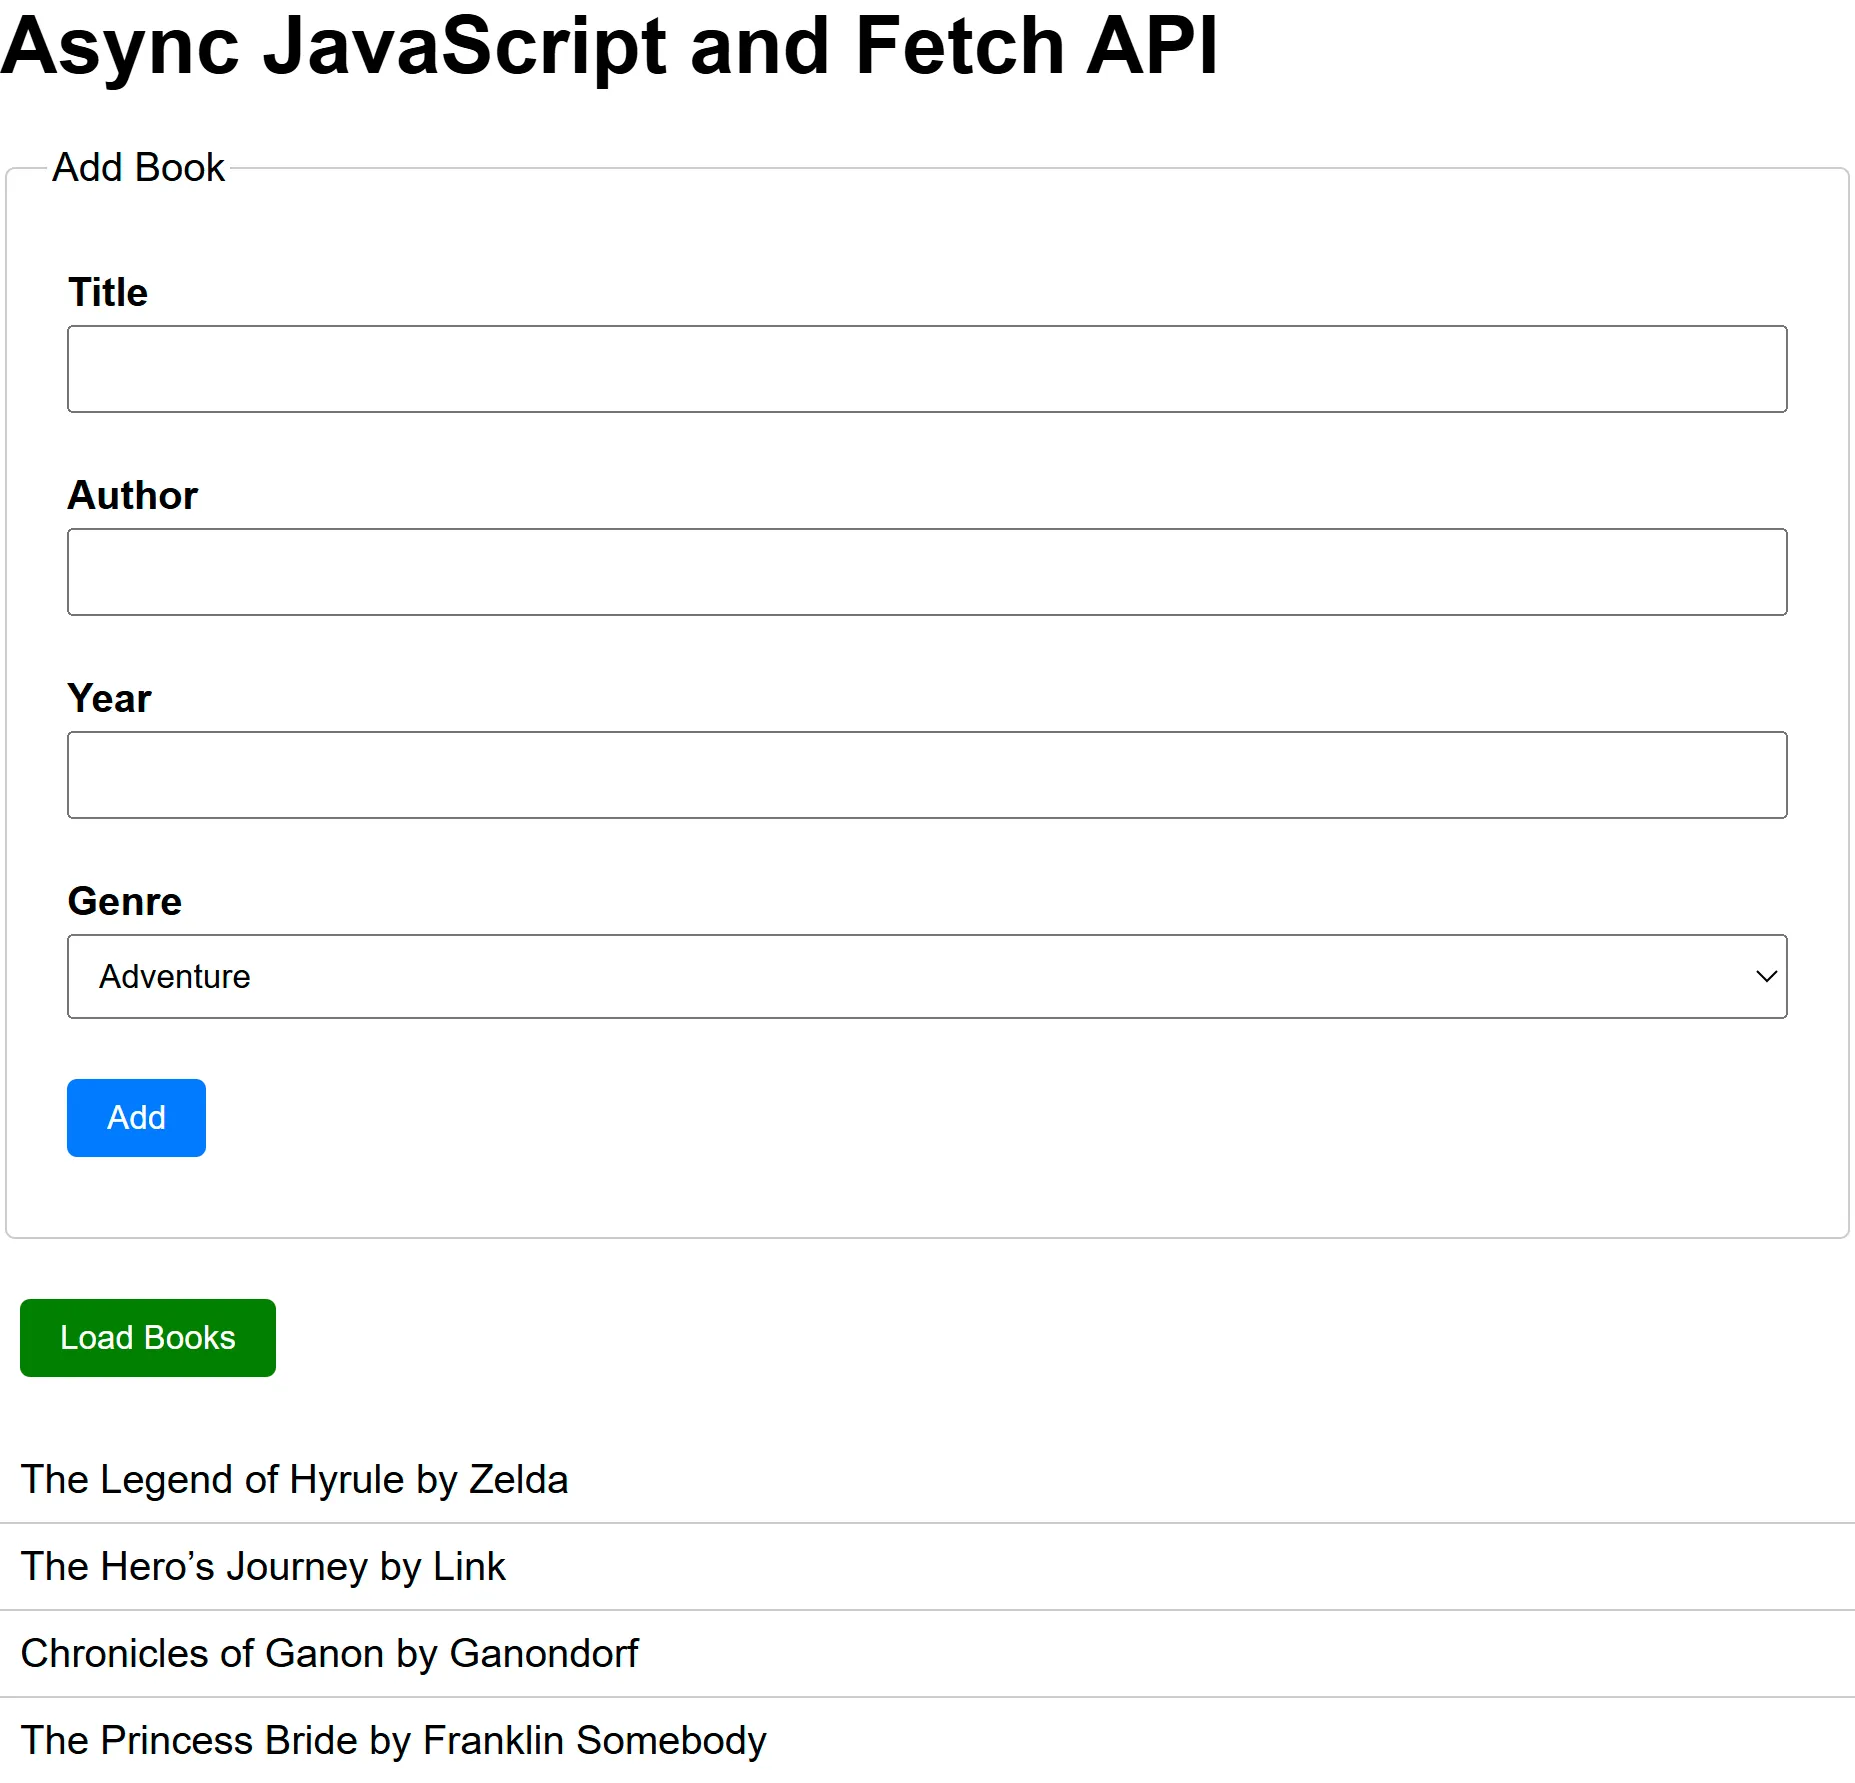
Inspect the Index page
Section titled “Inspect the Index page”In the index.html file, you will see the interface is fairly simple. It consists only of a heading, a form for adding new books, and a button with ul for rendering the fetched books to the page.
Instructor Demo
Section titled “Instructor Demo”Working alongside your instructor, you will create and call async functions to interact with the backend API server. A simple function to fetch data will be created followed by an event handler for the form to post new data to the server.
Build Utility Functions
Section titled “Build Utility Functions”To keep our concerns separate, create a utils.js file for the API functions
In this file, export a function for fetching data; it should not be specific to the application context we’re woring in (i.e., does not presume ‘books’). The function requires only the desired endpoint as a parameter.
export async function fetchData(endpoint) { const response = await fetch(endpoint); if (!response.ok) { throw new Error('Network response failed'); } const data = await response.json(); return data;}Note that exception handling is not done here. The calling application will be responsible for handling any exceptions that may occur during API calls.
Also export a function that can be used to post data.
export async function postData(endpoint, payload) {  const response = await fetch(endpoint, {    method: 'POST',    headers: {      'Content-Type': 'application/json',    },    body: JSON.stringify(payload),  });
  if (!response.ok) {    throw new Error('Network response failed');  }
  const data = await response.json();  return data;}
This function requires additional headers to be set as we can’t rely on the defaults.
Build the App
Section titled “Build the App”Now that we have funtions available to work with the backend, we can use them in our application.
Import both functions into main.js:
import { fetchData, postData } from './utils';And then select all the required elements:
const loadButton = document.getElementById('loadBooks');const addForm = document.getElementById('addBook');const list = document.getElementById('bookList');We will also create an endpoint constant to use in our API function calls:
const endpoint = 'http://localhost:3000/books';Add Event Listeners
Section titled “Add Event Listeners”The application provides two features: loading existing books and creating new books. First, add the load handler function. This function will fetch the books collection and render each book to the page.
async function loadHandler() {  list.innerHTML = '<li>Loading...</li>';
  try {    const books = await fetchData(endpoint);
    list.innerHTML = '';
    books.forEach((book) => {      const li = document.createElement('li');      li.textContent = `${book.title} by ${book.author}`;      list.appendChild(li);    });  } catch (error) {    list.innerHTML = `<li style="color:red;">Error: ${error.message}</li>`;  }}
Connect the handler to the loadButton:
loadButton.addEventListener('click', loadHandler);Next, add the submit handler function. This function will gather data from the form and post the request to the backend.
async function submitHandler(e) {  e.preventDefault(); // never reload the page  const form = e.target;  // Use the FormData API to collect form data  // NOTE: this example lacks form validation, which should be implemented  const formData = new FormData(form);  const data = Object.fromEntries(formData.entries());  data['year'] = Number(data.year); // convert year to number
  try {    await postData(endpoint, data);
    // Call loadHandler to refresh the list    loadHandler();  } catch (error) {    // TODO: Display a better error for the user    console.error('Error submitting form:', error);  }}
Connect the handler to the addForm:
addForm.addEventListener('click', submitHandler);You should now be able to load and add books.
Student Exercise
Section titled “Student Exercise”Extend the example by adding functionality to DELETE a selected book.
Hint: Use an additional button or link on each rendered book to trigger the operation.
Common Errors & Fixes
Section titled “Common Errors & Fixes”| Issue | Cause | Solution |
|---|---|---|
TypeError: Failed to fetch | JSON Server not running | Start the server (npx json-server --watch db.json --port 3000) |
| CORS error | Using file:// path | Run your page through vite (npm run dev) |
| Empty list | API returned no data | Check db.json contents |
| Error message shows on screen | Network or code issue | Inspect console for detailed error |
Push to Your GitHub Workbook Repo
Section titled “Push to Your GitHub Workbook Repo”Once you’re done making your own custom updates to the project, stage your files, commit your work, and push to the remote repository.
- Open a terminal in VS Code
- Stage all updated and created files:
git add .- Commit the changes:
git commit -m 'Lesson 16 Example'- Push your changes to the remote workbook repository:
git push origin main