Advanced UI Communication with Custom Events
Advanced UI Communication with Custom Events
Section titled “Advanced UI Communication with Custom Events”Learning Outcome Guide
Section titled “Learning Outcome Guide”At the end of this class, you should be able to…
- Explain the role of custom events in enabling advanced UI communication.
- Demonstrate how to create, dispatch, and handle custom events in JavaScript.
- Apply custom events to decouple component logic and improve maintainability.
Emphasize how custom events enable loosely coupled communication, reducing reliance on direct parent-child props or global state.
Highlight trade-offs: great for decoupling, but overuse can make event flow harder to trace. This lesson bridges vanilla event concepts with framework-based communication strategies introduced later.
Starter Kit Code
Section titled “Starter Kit Code”Grab the starter kit code for your Workbook by running the following in the VS Code terminal at the root of your workbook.
pnpm dlx tiged --disable-cache --force DG-InClass/SDEV-2150-A03-Jan-2026/sk/day-04/example/lesson-04-starter ./src/lesson-04Lesson focus
Section titled “Lesson focus”In this lesson we build an event-driven, reactive UI using Web Components.
We’ll implement two connected behaviours:
- Selection reactivity: clicking a result updates the details panel (lesson 03)
- Filtering reactivity: submitting the filters form updates the results list (current lesson)
The core pattern is consistent:
- A user action happens
- A component emits a custom event describing what changed
- Another part of the app reacts by updating state and re-rendering
We are still not using a framework. We’re practicing the mental model that frameworks later formalize.
TBA
Instructor demo
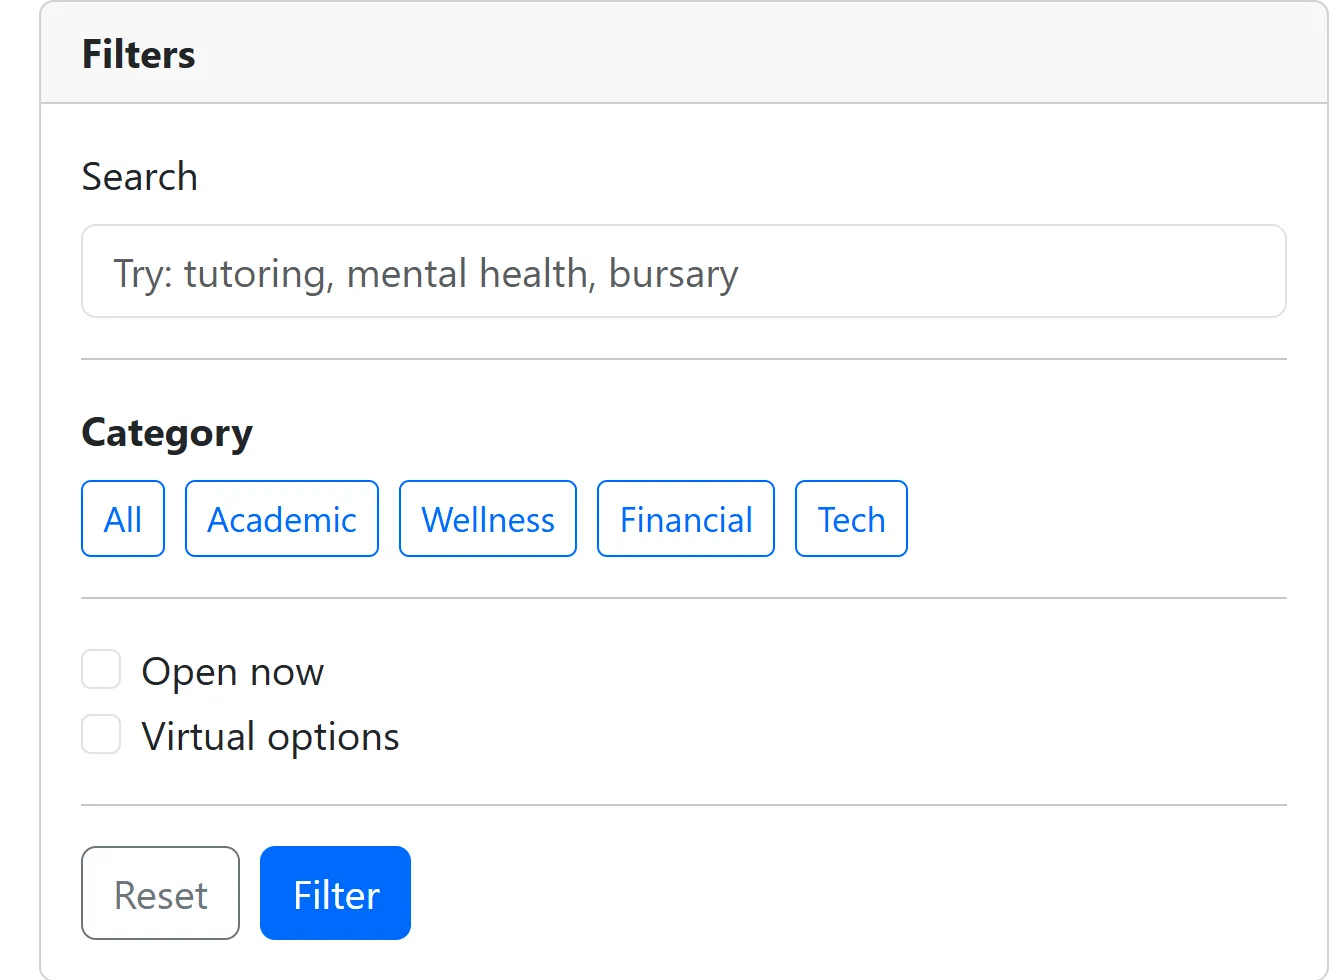
Section titled “Instructor demo”Target behaviour
Section titled “Target behaviour”- The filters form is submitted
- Filter state is emitted as a custom event
- The results list updates to reflect the new filter state
- Selection behaviour continues to work
We’ll use submit-based filtering for clarity (live filtering is a stretch goal).
Concepts explored
Section titled “Concepts explored”- Event-driven programming (user actions trigger code)
- Custom events (
CustomEvent) - Event bubbling and event composition (
bubbles,composed) - One-way data flow between components
- Reactive UI updates (state changes trigger re-render)
- Shadow DOM communication (events crossing the boundary)
Event Contract
Section titled “Event Contract”We will be explicit about the event contract between components.
An event contract defines:
- Who emits the event
- What the event is called
- What data it carries
- Who is allowed to listen and react
Event: resource-filters-changed
Section titled “Event: resource-filters-changed”Emitted by:
<resource-filters>
When it fires:
- The filters form is submitted
Purpose:
- Describe the current filter state to the rest of the application
Event configuration:
bubbles: truecomposed: true
Event detail payload:
{ query: string, category: string | null, openNow: boolean, virtual: boolean}Who listens:
main.js
What the listener does:
- Passes the filter state to
<resource-results>via a method or propety such assetFilters(filters)orset filters(filters).
Walkthrough
Section titled “Walkthrough”Step 1: Agree on the data shape
Section titled “Step 1: Agree on the data shape”We’ll use the same data shape across components.
Example:
{ query: 'tutor', category: 'academic', openNow: true, virtual: true,}Step 2: Dispatch resource-filters-changed on form submit
Section titled “Step 2: Dispatch resource-filters-changed on form submit”In <resource-filters>:
- Default to “All” category
- Support individual category selection (assign class
activeto selected category) - Listen for the form
submitevent andpreventDefault() - Read current form values
- Dispatch
resource-filters-changedwith the full filter state
Step 3: Results react to filter state
Section titled “Step 3: Results react to filter state”In <resource-results>:
- Store the full dataset
- Store current filters
- Add a method or property, such as
setFilters(filters)orset filters(filters) - Filter the dataset (without mutating the original)
- Re-render the list based on the filtered results
Step 4: Wire filters to results in main.js
Section titled “Step 4: Wire filters to results in main.js”In main.js:
- Listen for
resource-filters-changed - Call
results.setFilters(filters), or setresults.filters = filters
Step 5: Verify reactive behaviour
Section titled “Step 5: Verify reactive behaviour”- Submitting the form changes which results are displayed
- Selecting a result still updates the details panel
- The UI reflects current state at all times
Open for Code Changes
Lesson 04 Code Walkthrough
Section titled “Lesson 04 Code Walkthrough”In this lesson, the focus is on adding functionality to the Resource Filter. This involves
- Processing for submission inside the component
- Rasing a custom event
'resource-filters-changed'
Modify resource-filters.js
Section titled “Modify resource-filters.js”-
To begin, we’ll have the All button as the active filter. This just stylistically identifies that filter button/state as the “default” for the component.
src/js/components/resource-filters.js <button class="btn btn-sm btn-outline-primary" type="button">All</button><button class="btn btn-sm btn-outline-primary active" type="button">All</button> -
Next, we’ll create a
_handleSubmit()function. The purpose of this is to do the “internal” processing of the form’s submit.src/js/components/resource-filters.js // Step 2: Create submit handler method._handleSubmit(event) {event.preventDefault();// TODO: Build a filters object: { query, category, openNow, virtual }.const query = this.shadowRoot.querySelector('#q').value.trim();const categoryGroup = this.shadowRoot.querySelector('[aria-label="Category filters"]');const categoryButton = categoryGroup.querySelector('.active') || categoryGroup.querySelector('button');const category = categoryButton ? categoryButton.textContent.trim().toLowerCase() : 'all';const openNow = this.shadowRoot.querySelector('#openNow').checked;const virtual = this.shadowRoot.querySelector('#virtual').checked;const filters = {query,category,openNow,virtual,};// TODO: Dispatch a bubbling and composed CustomEvent('resource-filters-changed', { detail: filters }).const filtersEvent = new CustomEvent('resource-filters-changed', {detail: filters,bubbles: true,composed: true,});this.dispatchEvent(filtersEvent);} -
We’re going to modify the
connectedCallback()anddisconnectedCallback()functions to associate the'submit'event of the component’s<form>to our event handler.src/js/components/resource-filters.js // TODO: Manage lifecycle and events (i.e., connectedCallback, disconnectedCallback).connectedCallback() {this.render();// TODO: Add a submit listener to #frm-filter.this._formEl = this.shadowRoot.querySelector('#frm-filter');this._formEl.addEventListener('submit', this._handleSubmit);// TODO: Add click listener to category buttons.}disconnectedCallback() {if (this._formEl) {this._formEl.removeEventListener('submit', this._handleSubmit);}} -
Let’s follow up with a similar event handler for changing the category. We’ll create a
_handleCategoryClick()method.src/js/components/resource-filters.js // TODO: Handle category button clicks to set active state._handleCategoryClick(event) {const button = event.target.closest('button');if (!button || !this._categoryGroupEl.contains(button)) {return;}const activeButton = this._categoryGroupEl.querySelector('.active');if (activeButton && activeButton !== button) {activeButton.classList.remove('active');}button.classList.add('active');} -
Once again, we’re going to modify the
connectedCallback()function to tie the'click'event of the component’s<form>to our event handler.src/js/components/resource-filters.js // TODO: Manage lifecycle and events (i.e., connectedCallback, disconnectedCallback).connectedCallback() {this.render();// TODO: Add a submit listener to #frm-filter.this._formEl = this.shadowRoot.querySelector('#frm-filter');this._formEl.addEventListener('submit', this._handleSubmit);// TODO: Add click listener to category buttons.this._categoryGroupEl = this.shadowRoot.querySelector('[aria-label="Category filters"]');this._categoryGroupEl.addEventListener('click', this._handleCategoryClick);} -
Lastly, we will modify the constructor. The purpose of the calls to
.bind(this)are to associate thethiscontext of the_handleSubmitand_handleCategoryClickfunctions to this particular instance of the rendered component.src/js/components/resource-filters.js constructor() {super();this.attachShadow({ mode: 'open' });// TODO: Bind event handler methodsthis._handleSubmit = this._handleSubmit.bind(this);this._handleCategoryClick = this._handleCategoryClick.bind(this);}disconnectedCallback() {if (this._formEl) {this._formEl.removeEventListener('submit', this._handleSubmit);}if (this._categoryGroupEl) {this._categoryGroupEl.removeEventListener('click', this._handleCategoryClick);}}
Modify main.js
Section titled “Modify main.js”Let’s add an event listener for the custom resource-filters-changed events.
// Step 4: Wire <resource-filters> to <resource-results>.// TODO: Listen for `resource-filters-changed` (bubbles and composed from Shadow DOM).// TODO: Pass filters to results via resultsComponent.setFilters(filters) or resultsComponent.filters = filters.const filtersComponent = document.querySelector('resource-filters');filtersComponent.addEventListener('resource-filters-changed', (event) => { // TODO: Reset details view when new filters are applied (clear previous selection). resultsComponent.filters = event.detail; const detailsComponent = document.querySelector('resource-details'); detailsComponent.resource = null;});Modify resource-results.js
Section titled “Modify resource-results.js”The <resource-results> component needs some properties to manage the effects of filtering.
-
Let’s start with adding in a private property for the filtered result data and for the filters being applied. This is the data that originated from the
<result-filters>custom event and was routed here via the custom event handler in themain.js.src/js/components/resource-results.js class ResourceResults extends HTMLElement {#results = [];// Step 3: Store the filtered dataset and current filters, then derive and render filtered results.// TODO: Keep a filtered copy of the dataset (e.g., #filteredResults).#filteredResults = [];// TODO: Add a private filters field that triggers filtering and re-render.#filters = {query: '',category: 'all',openNow: false,virtual: false,}; -
We’ll also throw in a private function to do the heavy lifting of applying the filters to the rendered results.
src/js/components/resource-results.js // TODO: Filter without mutating the original dataset.#applyFilters() {const { query, category, openNow, virtual } = this.#filters;const normalizedQuery = query.trim().toLowerCase();const normalizedCategory = (category || '').trim().toLowerCase();// There are many ways to implement filtering; the following is just one approach.this.#filteredResults = this.#results.filter((result) => {if (normalizedQuery) {const haystack = [result.title,result.summary,result.category,result.location,].join(' ').toLowerCase();if (!haystack.includes(normalizedQuery)) {return false;}}if (normalizedCategory && normalizedCategory !== 'all') {if (result.category.toLowerCase() !== normalizedCategory) {return false;}}if (openNow && !result.openNow) {return false;}if (virtual && !result.virtual) {return false;}return true;});this.render();} -
Next, we’ll add a public setter property to trigger filtering and re-rendering.
src/js/components/resource-results.js // TODO: Add a filters property (e.g., set filters(filters)) that triggers filtering and re-render.set filters(filters) {// Retain ALL existing filter values unless explicitly overriddenthis.#filters = {...this.#filters,...filters,};this.#applyFilters();} -
We’ll also tweak our rendering to give proper context about the data we’re showing.
src/js/components/resource-results.js render() {const content = template.content.cloneNode(true);// Step 3: Render from the derived (filtered) results, show an empty-state when none match.// TODO: Use the filtered results to build the list items.if (this.#results.length) {if (this.#filteredResults.length) {// Generate the list of results to displayconst resultsHtml = this.#results.map(result => `<button type="button" class="list-group-item list-group-item-action" data-id="${result.id}">const resultsHtml = this.#filteredResults.map(result => `<button type="button" class="list-group-item list-group-item-action" data-id="${result.id}"><div class="d-flex w-100 justify-content-between"><h2 class="h6 mb-1">${result.title}</h2><small>${result.category}</small></div><p class="mb-1 small text-body-secondary">${result.summary}</p><small class="text-body-secondary">${result.location}</small></button>`);const listGroup = content.querySelector('.list-group');listGroup.innerHTML = resultsHtml.join('');} else {// No results found messageconst listGroup = content.querySelector('.list-group');listGroup.innerHTML = `<div class="list-group-item"><p class="mb-0">No results found.</p></div>`;}// Clear existing content and append new contentthis.shadowRoot.innerHTML = '';this.shadowRoot.appendChild(content);}}
Modify resource-details.js
Section titled “Modify resource-details.js”This file needs a small change at the end of its render function. It will hide action buttons when no resource is selected.
render() {  if (this.#resource) {    const detailsContainer = document.createElement('div');    detailsContainer.classList.add('card-body');
    detailsContainer.innerHTML = `      <h2 class="h5">${this.#resource.title}</h2>      <p class="text-body-secondary mb-2">${this.#resource.summary}</p>
      <dl class="row mb-0">        <dt class="col-4">Category</dt>        <dd class="col-8">${this.#resource.category}</dd>
        <dt class="col-4">Location</dt>        <dd class="col-8">${this.#resource.location}</dd>
        <dt class="col-4">Hours</dt>        <dd class="col-8">${this.#resource.hours}</dd>
        <dt class="col-4">Contact</dt>        <dd class="col-8">${this.#resource.contact}</dd>      </dl>    `;
    this.shadowRoot.innerHTML = '';    this.shadowRoot.appendChild(template.content.cloneNode(true));    this.shadowRoot.querySelector('slot').appendChild(detailsContainer);  } else {    // If no resource is selected, just render the template    this.shadowRoot.innerHTML = '';    this.shadowRoot.appendChild(template.content.cloneNode(true));    // TODO: Hide action buttons when no resource is selected    const content = template.content.cloneNode(true);    content.querySelector('.card-footer').classList.add('d-none');    this.shadowRoot.appendChild(content);  }}
Assessment
Section titled “Assessment”Minimum requirements:
- Submitting the filters form dispatches
resource-filters-changed - Results update based on emitted filter state
- The original resource dataset is not mutated
Student exercise
Section titled “Student exercise”Stretch goals:
- Implement filter form reset
- Implement live filtering by dispatching
resource-filters-changedon input/change events - Update the example to support multiple category selections
- Debounce the search input to reduce unnecessary re-renders (applies to live filtering)
Push to your GitHub workbook repo
Section titled “Push to your GitHub workbook repo”- Stage all changes:
git add .- Commit:
git commit -m 'Lesson 04 - Reactive filtering'- Push:
git push origin main